Heart Mobile
If you’re a new parent or parent-to-be and you’re looking for a fresh project, why not make a cute heart mobile for the baby’s room? You’ll need:
- Ribbon
- 8-inch dowel
- Acrylic paint
- Felt, assorted colors
- Batting
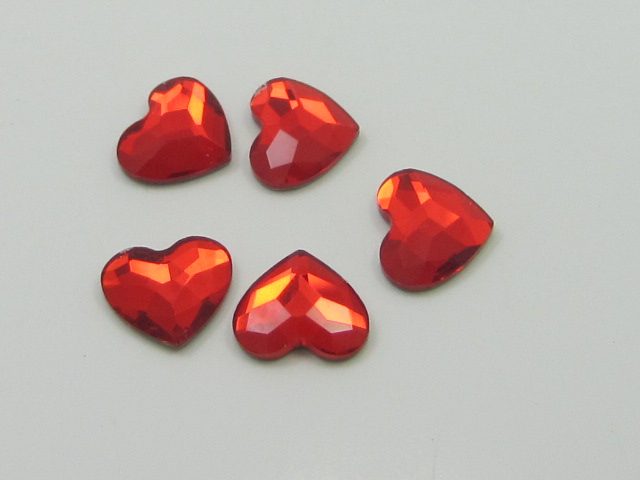
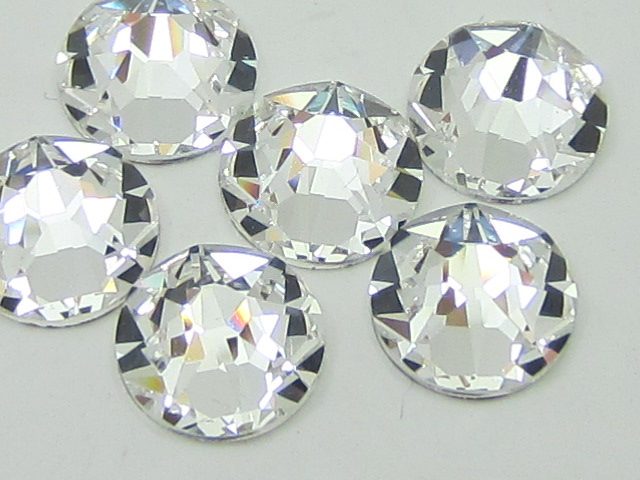
- Heart-shaped rhinestones
- Scissors
- Needle and thread
First you’ll want to make your stuffed hearts, which will hang from the dowel. Cut hearts in matching pairs, about three inches wide. Use a printable heart template from the String Art guide.
Stitch most of the way around the outside of the heart, then stuff with batting, and then finish sewing the heart. Make five hearts total, and attach a heart-shaped rhinestone to the middle of each heart.
Cut five lengths of ribbons, varying in length from five to eight inches. These will then be sewn to the top of each heart. Paint your dowel, if desired.
Tie each heart to the dowel, making sure there is room for the hearts to hang. Cut a 24-inch piece of ribbon and attach to the dowel and use it to hang your mobile.
Cedar Votive Holders
Create something that’s a blend of rustic and bling that will help set a romantic and unique table.
To make these votive holders, you’ll need cedar discs, which you may be able to find from your yard or from a neighbor, but you can also buy them online.
Ultimately, a tea candle is going to rest partially inside it, so you’ll want a disc that is relatively thick. Use a tea candle to make an outline on a cedar disc. Using a rotary tool, carefully remove wood where the tea candle will go. Be patient—this part may take a little time, and be sure not to cut all the way through the disc.
To finish the disc, add rhinestones to either the sides of the disc or the top that will surround the candle. The rhinestones will help the candlelight sparkle!
Simple Heart Vase
It really is simple. Promise. The premise Is white branches, paper hearts and rhinestones, and a vase. That’s it.
You’ll need a vase of your choosing, and bare florist branches, If they aren’t already white, go ahead and spray paint them white.
Scour your scrapbooking stash or dig through the scrapbooking section of the craft store and find Valentine’s themed patterned paper. Cut the paper into 1-inch wide pairs of hearts.
You don’t have to do this for every branch, but every so often, take a pair of hearts, and glue them back to back (pretty side facing out!) on the tips of branches. Continue this until you have a vase full of branches and it looks full.
Finally, you can add your rhinestones. Use a variety of colors for visual interest while still keeping with the Valentine’s theme.
Plastic Ring Heart Wall Art
Create a wall piece that’s easy to make and easy on the budget. Using plastic rings, you can make a heart wall art that’s festive, fun, and sparkly!
Use twelve plastic rings and a skein of variegated red and pink yarn. Wrap each ring with yarn to cover the plastic. Carefully arrange the rings in a heart shape and securely attach the rings to one another using hot glue and yarn.
Add rhinestones to the rings to finish the heart.
Sparkle Year Round
Valentine’s Day doesn’t have to be all about the chocolate and cards (but it doesn’t hurt). We hope you have a fun and dazzling holiday full of good crafting. Be sure to check out The Rhinestone Shop’s full inventory of rhinestones, nailheads, and supplies!
Celebrate the Holidays with Rhinestones
Can you believe it’s that time of year again? It ‘s time to pull out all of your favorite rhinestones and start working on decorations and gifts for the winter holiday season.
Christmas and New Year’s are great times to bring out the sparkle, and we’ve found a few projects that are easy to accomplish in a short amount of time, which is exactly what we need during this hectic time of year.
Winter Wreath
For many of us, winter is the time to enjoy snow and cold weather—or staying inside out of the cold making rhinestone crafts. We have a wonderful winter wreath idea that works as a beautiful seasonal decoration or a gift for a friend.
For this minimalist and striking wreath, you’ll need:
- Foam wreath base (white)
- Bare branches, about 6 inches in length (approximately 20 branches)
- Floral wire (white)
- White acrylic spray paint
- White or silver wire ribbon
- Silver rhinestones
Spray paint the foam wreath base white if you weren’t able to find a white base. Then, individually spray paint your branches white. You’ll want to take this part of the project outside, and be sure to use newspapers to protect your space.
You can use branches from bare trees in your yard, but you can also find artificial branches in craft stores. If your artificial branches come with berries or other add-ons, go ahead and paint the whole branch. You’ll need enough branches to build your entire wreath, and you may want to find smaller branches as filler.
Arrange your branches in the same direction around the foam base, securing with the floral wire as you go. You may also want to hot glue the bases of the branches in place for extra security. Use smaller branches for filler.
Now it’s rhinestone time! Using small rhinestones, fix the rhinestones to the branches, keeping them scattered throughout. If you want (and depending on the size of your branches) you can use varying sizes of rhinestones for visual variety.
Finish your wreath with ribbon and a bow, and hang on your door or give to a friend!
Embroidery Hoop Ornament
Ornaments are wonderful craft projects that can be as simple or as complex as you want, and they become cherished keepsakes for your friends and family.
This charming ornament is a blend of rustic and bling, making it a unique offering. To make an embroidery hoop ornament, you’ll need:
- Small embroidery hoop
- Embroidery fabric
- Sew-on or flat-backed rhinestones
- Needle and thread
- Ribbon
Think about your rhinestone pattern. For Christmas, a snowflake or a poinsettia flower are simple choices that look beautiful when done with rhinestones. You can lightly pencil out your design on the fabric, but make sure you measure your design to fit the inside of the embroidery hoop.
If you’re using sew-on rhinestones, start by securing your fabric to the embroidery hoop. You’ll want some excess fabric on the sides— you can trim that away later. Sew your rhinestones to the fabric carefully.
If you’re using flat-backed rhinestones, fix your rhinestones while working on a flat surface, then secure the fabric to the embroidery hoop, keeping your rhinestone design centered in the hoop.
Don’t forget – the embroidery hoop screw should be at the top of the design. That’s where you’ll attach your ribbon. Cut a piece of ribbon about 6 inches long and tie it in a loop around the screw. Then hang it from your Christmas tree!
Cookie Cutter Ornaments
Can’t get enough ornaments? Neither can we! Here’s one more great (and easy) ornament idea for your bling Christmas tree.
Assemble:
- Metal cookie cutters (the ones without handles)
- Decorative papers
- Scissors
- Glue
- Flat-backed rhinestones
- Ornament hooks
Find decorative paper that’s festive (check the scrapbooking sections of craft stores). You’ll apply plenty of glue to the cutter edges of the cookie cutters and press down on the paper and let it dry completely. Then cut away the excess on the outside. Important: leave a paper tab at the top of the ornament for the hook!
Apply your flat-backed rhinestones in complementary colors in different patterns on the paper. Make sure to leave room for your paper design to show through. Punch a small hole in the tab at the top, and apply a coat of clear-drying adhesive or nail polish to reinforce the ornament hook hole.
Snowy Picture Frame
The Rhinestone Shop has an incredible selection of rhinestones, including novelty shapes. For winter, why not use these great snowflake rhinestones?
A fun seasonal gift that makes use of these unique rhinestones is a sparkling picture frame. Use a mix of snowflakes and other shapes, and mix sizes, but keep them all the same color. Having too much of a mix of shapes and colors can start to look cluttered.
Tip: Before fixing any rhinestones in places, lay them out in your pattern to see what the final product will look like. Fix everything to your desired picture frame.
Bling in the New Year with champagne flutes
It’s a great feeling saying goodbye to the old and hello to the new, and it’s even better with a glass of bubbly in your hand!
Top off your year with a set of bling champagne flutes that you can use for your New Year’s party. You’ll need smooth plastic champagne flutes and flat-backed rhinestones in assorted shapes and colors.
The idea is to make each champagne flute different so that your guests can identify their glass, kind of like permanent wine charms. Get creative! Make patterns, or use unique rhinestone shapes.
You can bling just the base of the glass, or you can use tiny stones on the stem or on the glass itself. Pro tip: use smaller rhinestones on curved surfaces—they will adhere better to the surface.
Swarovski rhinestones for the holidays
The Rhinestone Shop has a large inventory of traditional and novelty rhinestones in a huge selection of shapes and sizes. Check out our size chart, color chart, and online inventory to find exactly what you need for your sparkling holiday project. Happy holidays!
Add Rhinestones to Your Thanksgiving Table
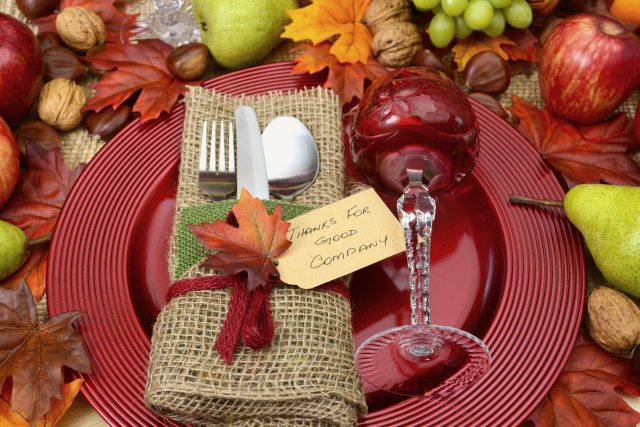
Now that we’re officially into the swing of fall, we’re absolutely ready to face our families and stuff our faces for Thanksgiving, followed by a nice relaxing post-meal in comfy yoga pants. But before we can get to yoga pants, we have to actually prepare for Thanksgiving, and part of that means assembling a beautiful table.
We’ve got some great ideas for ways to add rhinestones to your Thanksgiving table that will wow your guests.
Rhinestone Chargers
A quick and easy way to “fancy-up” a place setting is to add a charger. You may be familiar with a charger even if you didn’t know the name. A charger is the decorative plate underneath the plate you actually eat off of. Usually these are used in formal occasions.
Chargers can be found online or at many home goods stores. The best part about chargers is that you don’t need to spend a lot of money on them, and you can easily change the colors to match the theme of your table if you can’t find exactly what you’re looking for—after all, these aren’t for eating off of.
Once you have found the chargers you like, paint the outer edge to the color that best complements your table theme. You can always go with traditional fall colors of golds, browns, and reds, but don’t be afraid to try something different like a blue or a sage color.
Finally, it’s time for rhinestones. You can choose the shape of rhinestone that best fits the existing pattern of the charger, and it’s good to choose either a matching or complementary rhinestone color. Remember: flat-backed!
A table runner is an easy addition to a table that looks elegant without taking up a lot of table space, and it’s not necessarily a project that’s just for people who know how to sew.
You can purchase table runners at many home stores, which can easily be embellished with sew-on rhinestones. Sew-on rhinestones will be generally more secure in the event that you ever have to wash your table runner.
Alternatively, you can sew your own table runner, making sure it’s about 15 inches wide and hangs about a 12-15 inches off of the table at both ends. Create pointed ends if desired. The color of your table runner can be offset from the color of your tablecloth.
You can use a variety of fall colors for your table runner, which means you can use it all season, or you can make it specific to a particular color scheme—it’s up to you!
One approach that we love for table runners is using a mix a shapes to create an interesting and intricate pattern. For a particularly fall touch, check out our leaf-shaped rhinestones! Fall Foliage Gilded Centerpiece
Make a dramatic statement with this gilded centerpiece. For this project, you’ll need to assemble:
- Vase or upcycled jar
- Gold acrylic paint
- Artificial fall leaves on branches
- Flat-backed rhinestones
- Adhesive
First things first, paint your vase or jar gold. This is definitely going to be your focal point on the table, and you’ll want full coverage on your vase. Once the paint has fully dried (it may take a few hours), you can then start to add your rhinestones. This could be simply a small pattern, a row at the top of the vase, or a base. But as with most projects, you can do what feels right. Just remember that you’re already working with a gold base to start.
To finish your centerpiece you’ll arrange your branches of leaves to your vase, trimming the bottoms to fit as needed. Oranges and reds will provide a bright contrast to the gold of your vase.
Bling Name Plates
These adorable place settings add a touch of sparkle to your table (or kids table), and are surprisingly easy to make. Plus, they are reusable for next year!
For this project you’ll need:
- Flat-backed rhinestones
- Mini chalkboard nameplates
- Adhesive
- Chalk
Again, you’ll want rhinestones that complement the colors of your table centerpiece or overall table theme. As for the nameplates, these shouldn’t be too difficult to find either at a craft store or online. They have become a more popular table accessory over the last couple of years.
Wait until you’ve applied your rhinestones to add your names—you don’t want to smudge your lovely handwriting! Carefully make a frame of rhinestones around the nameplate, then use chalk to add your guests names. Once you have your place settings set, add the nameplates to the top of each setting.
You can either reuse them for next year, or you can offer them to your guests as a small parting favor. This Pumpkin Centerpiece is Lit
Lucky for us, pumpkins come in all shapes and sizes, which make them perfect for creating a charming seasonal centerpiece for your Thanksgiving table. For this centerpiece, you’ll want a variety of small to medium sized pumpkins. Them come is several different colors, but you can also paint them if you want to do something a little different.
The centerpiece will be pumpkins, some greenery, and rhinestone-studded candleholders. Arrange your greenery on the table and then arrange your pumpkins, and then you can get started on your candleholders.
You have so many choices in terms of the shape and style of candleholders, but we recommend choosing some that are shorter than your tallest pumpkin and have at least some flat surfaces. Depending on the size of your table, you may want between three and five candleholders.
Using flat-backed rhinestones, glue the rhinestones along the top edge of the candleholder. This will not block the candlelight and will allow the light to bounce off of the surfaces of the rhinestones and enhance the sparkle. The Rhinestone Shop for Holidays
The Rhinestone Shop has everything you could possibly need for Thanksgiving and the upcoming winter holidays, and now is the time to stock up! Be sure to check our huge inventory to find exactly the right sizes, shapes, and colors you need for your next sparkling project!
DIY Fall and Halloween Rhinestone Projects
 Fall is finally here! After what feels like a long summer, we’re ready to get into pumpkin spice everything and all things autumnal. Rhinestones, of course, will play a part in our DIY impulses, so check out some of our favorite projects for Fall. And don’t forget—Halloween is right around the corner too!
Spooky Plants
Are you planning a Halloween party? Cobwebs and skeletons are obviously great choices for décor, but if you want something a little less conventional, try making some of these spooky plants!
To start you’ll want to get your hands on artificial plants. Artificial succulents look particularly unique and interesting, but choose what appeals to your spooky inner self! You will also need black spray paint, preferably in a matte finish. If your plants are already in pots, that’s great. If not, you will need to acquire floral foam and pots to hold your plants.
Spray paint the whole plant and container black, making sure you get all of the nooks and crannies of your plant. Once it’s dry, you get to make your lifeless plant sparkle!
Black rhinestones, in our opinion, are the best choice for this project, but if something else suits your mood, go for it! Decorate the plant container with rhinestones, and if your plant has strong enough leaves, you can even add rhinestones to those.
To finish the whole look, use artificial cobwebs around the base of the plant for an extra touch of Halloween goodness.
Fall Lanterns
Imagine sitting outside in the chilly night air with a warm cup of cider. The only thing that would make it better would be the soft glow of candlelight. The solution? DIY seasonal lanterns.
We have two ideas for seasonal lanterns—one for Halloween, and one for any occasion in the fall.
For a festive Halloween lantern, we’re going for a mummy theme! You’ll need clear canning jars for your base lantern, and you’ll also need medical gauze (found at the drugstore), a hot glue gun, and two large, flat-backed, red rhinestones.
Unravel your medical gauze and get it all crinkly to start—this is going to be your mummy wrap. Glue one end near the top of the jar and start wrapping your way around, making sure to periodically glue down parts of the gauze. You’ll want to make sure some of it looks loosely attached to give it that “undead” look.
Finally, you’ll add your rhinestone eyes. These should be attached slightly underneath your mummy wrap. Add a battery-operated candle (You don’t want to accidentally set your mummy wrap on fire!) to your lantern and enjoy the spooky atmosphere.
For a more all-purpose lantern, you can start with an old fashioned lantern that you can find at shops that specialize in housewares. As with the mummy lantern, you’ll want to use a battery-powered light. The inside base of the lantern should be filled with a “nest” of artificial autumn leaves, which you can find at craft stores.
For the rhinestone component, you can add them to the outside of the lantern for some fall bling, but you can also add them to the inside seams of the lantern. These will still be visible from the outside, and the surfaces of the rhinestones will help reflect even more light. Choose your favorite fall colors and sit back and enjoy the glow.
Pumpkin Centerpiece
It’s definitely pumpkin season, and what better way to bring on the seasonal spirit than with a festive centerpiece? This charming table topper is easy to make, and there are a few varieties depending on what materials you have to work with.
One pumpkin topper that’s easy to make starts with those tiny decorative pumpkins you see in the grocery stores and pumpkin patches this time of year. Depending on your table size, you may want more than one pumpkin.
Get a small paring knife and carefully cut around the stem and carve out a small area (large enough for a tea candle). If desired, paint your pumpkin, and add small rhinestones to the cut edges. Finally, add a tea candle and enjoy your table topper!
If you don’t want the mess of a live pumpkin, or you’d rather have a centerpiece you can reuse, check your local craft store for inspiration. There are many options in terms of fall décor, and you may even want to do something with more of a Halloween vibe.
If you can find one of those ubiquitous pumpkin buckets, you can actually transform it into an adorable centerpiece for your Halloween party. Carefully remove the handle and add rhinestones to your pumpkin. Create a bed for your pumpkin centerpiece out of straw or artificial cobwebs. Finally, add either a candle for a glowing effect or fill it with candy for your guests!
Straw Wreath
In our opinion, there is a wreath for every season, and we love the idea of making a straw wreath studded with rhinestones. For this project you’ll need:
- Straw wreath base
- Craft straw
- Adhesive
- Flat-backed rhinestones, preferably in fall colors
- Ribbon
This wreath project is actually fairly simple. The straw will radiate from the wreath base, using craft glue to attach everything. Cut your straw in varying lengths from 5-8 inches, unless the craft straw is already cut for you.
Work your way around the wreath base by gluing straw to the base so that the straw extends perpendicular to the base. It’s okay if it gets a little messy in the middle—you’ll be covering that part with ribbon and rhinestones at the end.
Once you have your straw around the entirety of the base you can start to apply your rhinestones and ribbon. Construct a bow out of ribbon and attach it to the top of your wreath, and place a ring of rhinestones around the base of your straw to cover up any adhesive and to add some sparkle.
Hang your wreath and enjoy the fruits of your labor!
The Best Rhinestones for Fall
The Rhinestone Shop has an enormous selection of rhinestones in all shapes and colors. We also have nailheads and other decorative elements to make your next craft project sparkle and shine. Take a look at our ever-expanding inventory and find the perfect pieces for your Fall crafts.
How To Add Sparkle To Your Wedding—4 Things to DIY with Rhinestones
 If there’s one celebration that’s made for all things sparkle, it’s a wedding. Your wedding is an opportunity to bring out all of your bling and make everything a little brighter. Here are four ideas for how to add some much-loved sparkle to your wedding.
Wedding Dress Ribbon
The idea of actually making a wedding dress is something that most mortals can only dream of, but you can customize your purchased dress and make it something special.
With a little bit of handcrafting, you can create a wedding ribbon that will act as a waistband for your wedding dress, adding just enough sparkle to create something unique. For this project you’ll need the following:
- 1-inch wide sheer ribbon (coordinate with your dress color)
- Hotfix and sew-on rhinestones (assorted sizes)
- Needle and thread (dress color)
To measure what length of ribbon you’ll need, put on your wedding dress and wrap the ribbon around the waist of the dress where you want the ribbon placed. Add about 2 inches for overlap to ensure you have enough length and cut the ribbon.
Starting about one inch from the end of the ribbon, plan your rhinestone pattern. If you want a touch of color on your dress, don’t be afraid to use colored rhinestones, but clear crystal and silver rhinestones are classics.
Your rhinestone pattern may be a mix of larger and smaller rhinestones—you may want larger sew-on rhinestones as focal points. As with all rhinestone projects, plan your pattern before gluing and sewing. In fact, you may want to experiment on a scrap ribbon before doing the full piece.
When you have your pattern planned, adhere the rhinestones to the ribbon, remembering to leave an inch on each end. Finally, carefully stitch your ribbon to the waist of your wedding dress with the unadorned ends folded under and attached to the back of the dress.
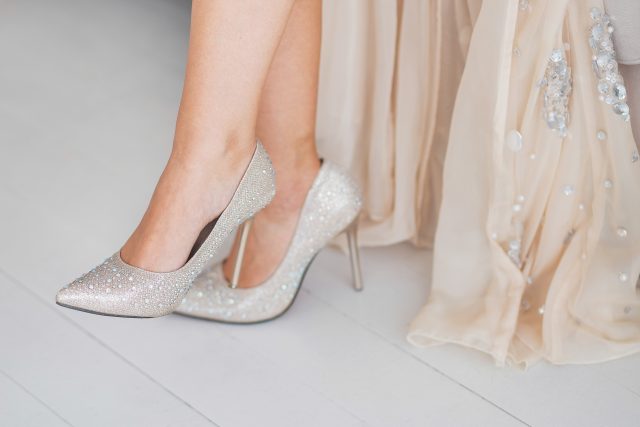
Cinderella Shoes
If the thought of directly working on your dress is a little intimidating, you could instead bling your footwear and create sparkling shoes that will make you feel like royalty.
You’ll want to find the perfect pair of shoes, preferably that is unadorned. They can be closed- or open-toed, and as flat or as spiky as you want them to be (but remember you’re going to be on your feet all day!).
You’ll need hotfix rhinestones, and the smaller you can get, the easier it will be to move around without the potential for them to fall off. Clear crystal rhinestones will give you the best “Cinderella” look, but feel free to experiment with different colors or an AB finish.
Carefully apply your rhinestones to your footwear, including the heel. When you’re done you’ll have the most fabulous shoes at the party!
Reception Centerpieces
While flowers are the traditional way to jazz up your reception tables, you can make them even more fun with rhinestones! There are a couple of easy ways you can add some sparkle to your centerpieces:
- Rhinestone ribbons on vases
- Rhinestone votive candleholders
If you have vases with floral arrangements, you can create rhinestone ribbons to wrap around the neck of the vase. This will allow you to use the vases again (or return them to the florist) while still adding your own touch. Wrap a length of ribbon around the vase and tie a bow—then snip the other end. Use this length as your template for the other vases.
Tie each ribbon around the vase and attach your rhinestones while on the vase. This will help you avoid placing rhinestones on the knotted part of the ribbon. Hotfix rhinestones will be easiest for this project, and you’ll want rhinestones that are smaller in diameter than the width of the ribbon (1/2”–1” ribbon width works best).
You can choose to use colored rhinestones or a colored ribbon if you would like, or you can just use classic clear crystal and a neutral sheer ribbon.
For votive candleholders, you’ll need votive candles and glass candleholders to fit. Use small hotfix rhinestones on the outside of the candleholder, which will help reflect the light from the candles, amplifying the sparkle at the table. This is a great project for minimalistic table settings.
Hair Accessories
In our opinion, one of the best ways to add some bling to your wedding is with gorgeous hair accessories. This could be in the form of a headband, pins, combs, or clips, and all of them are easy to DIY.
For headbands, you’ll obviously need a headband as your base, preferably one with flat surfaces. Use flat-backed hotfix rhinestones for your bling for a simple, but sparkling, headband.
To get a feel for rhinestone placement before you start, try a mock-up of your wedding hair and add your clips or combs without rhinestones. Then you can decide how big you want your piece to be—choose larger clips and combs for thicker hair and larger rhinestone settings.
To create sparkling hair clips, you can use a variety of techniques. Craft stores have a large assortment of hair clip bases that can simply be covered in rhinestones. If you’re ambitious and want something larger, you’ll need stiff felt as your base and small, sharp embroidery scissors to finish. Felt should be a color close to your hair color, if possible.
Create a pattern of flat-backed rhinestones in varying shapes (and possibly colors) before adhering them to the felt. Try and place your rhinestones as close together as possible, using small rhinestones as filler, but don’t be afraid to have a non-circular shape.
Finishing your hair clip will take some fine detail work. You’ll use embroidery scissors to very carefully trim away the excess felt from the rhinestones. You should have as minimal felt showing as possible. Glue the rhinestone piece to the hair clip to finish. This technique can be used for combs as well.
Swarovski Crystal Rhinestones for Your Wedding
The Rhinestone Shop has a huge selection of stones in many colors, shapes, and sizes. Check out our catalog to find the highest quality rhinestones for your DIY wedding projects!
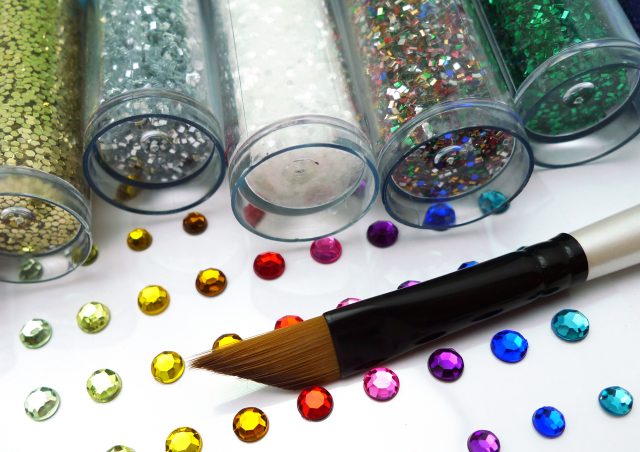
Can you believe it’s that time already? The kids seemed to have just gotten back from the pool and it’s already time to start thinking about going back to school. But never fear! Your child won’t have to go back to school with the same old boring supplies. We’ve got a few ideas for how to bling out your school supplies—and the kids can help!
