It’s certainly been a year like no other, and depending on where you live, life may feel a little chaotic. However, the seasons are still turning, summer is in full swing, and the 4th of July is quickly approaching.
Although many of us won’t be able to celebrate the Fourth in the traditional way among large groups this year, we can still have fun at home in our backyards, and better yet, make some fun crafts with rhinestones to keep the kids busy!
Let’s take a look at some easy, sparkly 4th of July kids rhinestone crafts!
Red, White, and Blue Windsock
Using some things around your house and some leftover craft bits, you and the kids can make these cute patriotic windsocks that are both fun to play with and help teach kids about wind.
You’ll need:
- Toilet paper rolls
- Red, white, and blue acrylic paint
- Red, white, and blue yarn
- Flat-backed rhinestones
- Scissors, paintbrush, rhinestone adhesive, and glue
The toilet paper roll is going to be the base of the windsock. To start, have the kids paint the toilet paper roll however they wish. Stripes, polka dots, solids, you name it.
Apply glue all over the toilet paper roll (who cares if hands get a little messy?) and wrap yarn around the roll. You can alternate colors, make swirl patterns, zigzag, or do whatever pattern you want.
So the whole point of a windsock is to have things that blow in the breeze, right? So now we need to make the dangly bits! Cut five 8-inch lengths of yarn.
Now it’s rhinestone time! Help your child carefully glue rhinestones to the windsock roll base and to the dangling yarn. Once the 8-inch yarn lengths are sufficiently sparkly (don’t put too many on—you don’t want it to get too heavy), glue them to the windsock base.
Glue a length of yarn to the top of the windsock to create a hanger.
4th of July Wand
If you don’t have any sparklers lying around, or if the kids are too little for sparklers, making a sparkling wand is the next best thing! Heck, even some of the older kids might want one for themselves too!
For this project, you’ll need:
- 3-inch foam star
- 12-inch wooden dowel
- Red, white, and blue acrylic paint
- Red, white, and blue ribbon
- Flat-backed rhinestones
- Scissors, paintbrush, and glue
Start by painting the foam star and the wooden dowel. When the paint has dried, apply rhinestones to the star.
Cut three 18-inch lengths of ribbon, one of each color. Apply a few rhinestones to each ribbon, leaving the center of the ribbon free of rhinestones—you’ll be attaching it to the dowel later.
Use the dowel to make a hole in the bottom of the star. The ribbons are going to be folded in half and glued to the top of the dowel and glued into the dowel hole you just made.
Patriotic Rhinestone Magnets
I remember when I was a kid playing with refrigerator magnets, watching them bounce off of each other and stick together. Making patriotic refrigerator magnets is a fun (and quick) activity that you and your kids can do together. Best of all—this project can be adapted for any time of year!
Gather together the following:
- Round ½” magnets
- Wooden discs (1–2 inches in diameter)
- Acrylic paint (red, white, and blue)
- Flat-backed rhinestones
- Glue
Start by painting your wooden discs (you can find these online at craft retailers). When the paint is dry, decide what type of rhinestone pattern you want for your magnet. Here are a few suggestions:
· Star
· USA
· Flag
The last thing to do is glue the magnet to the wooden disc. Here’s the trick. Place the magnet on your refrigerator before you glue it to disc so you know which side to glue!
Marble Art
We took some inspiration from the Kid-Friendly Things to Do blog. They have this fantastic idea for an easy art project for little kids to make fireworks out paint and some marbles. We’re going to jazz it up and make it three-dimensional with some rhinestones!
Get a shoebox and place white cardstock in the bottom of the box. You’ll need red and blue kid-friendly paint and the ability to be okay with everyone getting a little messy.
Have your child dip the marble in paint and put it in the shoebox and roll it around. Repeat until you’re happy with the “fireworks.”
When the paint is dry, it’s time to get rhinestone happy and make everything sparkle! Use flat-backed rhinestones to make the red and blue paint dazzle. Make the artwork extra special by putting it in a picture frame!
Suncatcher
Suncatchers are beautiful and surprisingly easy to make. You’ll need:
- Wax paper
- Red, white, and blue tissue paper
- White glue and water (mixed 2 parts glue to 1 part water)
- Scissors and paintbrush
- Flat-backed rhinestones
Cut two pieces of wax paper of equal size. This will be the backdrop for your suncatcher.
Lay one piece of wax paper flat—you may need to weigh down the corners while you work. Mix the glue and water together and keep nearby.
Meanwhile, cut your tissue paper into shapes. Stars would be great, but squares, or even tearing into shapes would work fine.
Brush a thin layer of glue mixture on the wax paper and lay a tissue paper shape on the glue. Press lightly. Don’t overlap your shapes too much because you want the light to shine through, and make sure you leave open space too.
When you’re done placing your tissue paper shapes, brush a thin layer of glue over the whole surface, and carefully place the second layer of wax paper on top. Wait for everything to dry, then trim the edges if needed.
Add your rhinestones to the wax paper. When the sun shines through the catcher, the light will bounce off the rhinestones and sparkle!
Hang the suncatcher in a window and enjoy your child’s beautiful artwork.
Your Source for the Finest Swarovski Crystals
The Rhinestone Shop has all of your rhinestone needs, from glue to nailheads to genuine Swarovski crystal rhinestones. Check out our massive inventory and add a little sparkle in your life!
 Unless you’re an essential worker, you’ve probably been spending most of your time stuck inside your home these past few weeks. It’s easy to let the stresses of the world start to weigh you down, so we at the Rhinestone Shop thought it might be a good time for a sparkly distraction—DIY rhinestone projects!
The goal this time is to keep you and the kids busy making gifts out of leftover rhinestones from other projects and use what you have laying around the house since it’s not particularly easy to just run out and pick up supplies right now.
Upcycle an Old Vase
Do you have a dusty, unloved vase sitting around somewhere? Maybe a ceramic bowl? Platter? It’s time to give these guys a makeover with a little bit of paint (if you have it) and some assorted rhinestones.
Paint your vase with either a solid base color or a base color and designs. Fingerprint flowers can be a sentimental addition if you have children. Add your rhinestones once the paint has fully dried.
Shoelace Bracelet
If you have colorful or interesting spare shoelaces in the house, these can actually be woven into cute bracelets with a rhinestone touch. If you don’t have shoelaces, this could theoretically work with study shoelace-sized ribbon, too. We have two styles you can work with, depending on what you have at home: the three-strand braid or the single lace weave.
The three-strand braid uses three different laces, preferably in three different colors. Tape the end of each lace to the top of a table or clip to a clipboard and start to braid fairly tightly. Braid until you have the length of the bracelet, plus extra for tying the ends. Bracelets are usually 6-8” for women and 7-9” for men.
When the braid is complete, tie the lace ends together that aren’t taped down. Take the tape off and to the same for the other end. Carefully glue flat-backed rhinestones to your bracelet. The bracelet can be fastened by either tying the ends together on the wrist or using a safety pin to hold it in place.
The single lace weave works if you only have one lace or ribbon. You’ll need a single shoelace and, optionally, a fastener (safety pin, or a jewelry fastener if you want to get fancy!).
To make the weave, you’ll want some visual assistance in the process. Thankfully, our friends at wonderfuldiy.com have a great gallery to help explain the loop process. We promise, once you get the first loop, the rest is easy peasy. If you aren’t going to use a fastener, don’t snip anything until after the weave is completed.
Keep weaving until you have your full bracelet length. For the final loop, you’ll push the other lace end through the available loop and pull to tie it off. If you don’t have a fastener and are going to tie the bracelet, leave about 2 inches before you snip the lace. If you do have a fastener, attach it now and make sure it fits, then snip the laces.
Tennis Ball Holder
If you’re a tennis person but don’t have any good dogs to share old tennis balls with, here’s a cute project/gift idea that we promise will have you smiling every time you see it.
The tennis ball holder attaches to the wall, looks like a cute smiling face, and is kind enough to hold things in its mouth for you like keys, mail, and pens. You’ll need:
- An old tennis ball
- Pencil
- A sharp knife
- A wall fastener (wall hook, suction cup)
- Big rhinestones for eyes
- Accessories to add personality to your holder (optional)
On one side of the tennis ball, draw a line where you would like the mouth to be. Very carefully make your cut. You can always make the mouth bigger if you need to, so start small and work your way larger. Try putting thing in the mouth and see if it’s wide enough.
The opposite side of the ball will attach to the wall, so you may need to make a small cut in the tennis ball to attach the wall fastener (Be careful!). Now you can add some personality! Your tennis ball holder needs eyes, and rhinestones, in our opinion, seem like the obvious bling choice.
Your holder is officially ready to be put to work, but you can always dress it up with more accessories like more rhinestones, flowers, miniature cowboy hats, or whatever else your glittering heart desires.
Bling Artsy Portraits
This is a craft project that may not be for everyone, but it works well if you have a high-quality printer. Find your favorite black-and-white image and print the best quality image you can on photo paper (if you have it) or cardstock.
Once you have your image, you can start adding your rhinestones to jazz up whatever features you’d like—sunglasses, earrings, clouds—the possibilities are endless!
Because there are rhinestones on your picture creating a three-dimensional effect, it likely won’t fit under a typical glass piece of a picture frame, but you can just do without.
Rhinestone “Cat” Flowerpot
Make an adorable flowerpot out of a 2-liter soda bottle that looks like a cat, and make it sparkle with rhinestones! You’ll need:
- Empty 2-liter soda bottle
- Paint
- Scissors
- Rhinestones and adhesive
Cut the top two-thirds of the bottle off and discard. Using this template as a guide (and also as more detailed instructions on the project), cut the ears out of the top inch of the remaining bottle. Paint the entire outside of the bottle to your desired cat color.
Now you can make your rhinestone cat face! If you want, you can use a mix of permanent markers and rhinestones to make the face, or you can go full bling, depending on your supply levels. The ears, eyes, nose, and whiskers should all be visible. Add some gravel, dirt, and a houseplant, and you’re good to go!
The Rhinestone Shop is Still Open!
The Rhinestone Shop is still open and getting supplies out to you, even in these hard times. Be sure to check out our constantly expanding inventory of Swarovski crystal rhinestones, glue, tools, and more.
It’s a lucky time of year when everyone gets to feel a little bit Irish, even if you’re not. And of course, we’ve got some rhinestone crafts to celebrate St. Patrick’s Day—like we need an excuse to bust out the sparkles. Without further ado, check out these fun (and sparkly) DIY rhinestone projects to bring a bit of green and good into your life.
Lucky Rainbow Sign
Bring a little bit of luck and color into your home with a rainbow and clover sign to hang on your door. You don’t have to reinvent the wheel—you can even find a sign from a craft store that you like the shape of and paint over it with a white background.
Once you have a sign you like, assemble the following:
· Acrylic paints in rainbow colors (red, orange, yellow, green, blue, purple)
· Painter’s tape · Four-leaf clover template
· Pencil
· Flat-backed green rhinestones
· Adhesive
The background of the sign should be painted with horizontal rainbow stripes, but if you’re not a robot, it’s nearly impossible to paint horizontal lines and keep them crisp and straight. Here comes our savior—painter’s tape.
Carefully place painter’s tape on either side of where you want the rainbow stripe to go then paint your rainbow color. Wait for the paint to dry and then pull the tape away. Feel free to change up the widths of your rainbow stripes for variety.
When all of the paint is dry, you can work on your rhinestone clover. Print your clover template and carefully cut it out. Place it in the center of your sign and outline the clover with a pencil.
Using adhesive, fix your rhinestones in the shape of a clover and hang your sign on your door for all to see!
Four-Leaf Clover Pencil Toppers
This easy project makes a cute gift for the kids to take to school. Make one for the teacher too!
You’ll need to get the following:
· Stiff green felt
· Sharp embroidery scissors
· Flat-backed green or gold rhinestones
· Adhesive
· Green or gold ribbon · Clover template
Print a clover template for clovers about 1-1.5 inches wide and carefully cut. Use that as a template for your felt and use embroidery scissors to cut your felt. Embroidery scissors allow for detail work better than larger scissors.
Glue rhinestones to the felt clover in any pattern you choose, but don’t make it too heavy that the clover can’t stand upright.
Glue one clover to the top of a pencil. Cut two 4-inch pieces of ribbon for each pencil and glue the center of each piece of ribbon to the base of the clover. Finally, glue one rhinestone to the base of the clover to cover the center of the ribbons.
Shamrock Garland
Make a cute string of garland to hang in a window. This one requires a little bit of stitching.
To make this garland, start by using this shamrock template. Use shamrocks that are about 3 inches wide, and don’t worry about the tiny stems. Using green felt, cut 16 shamrocks total.
Stitch two shamrocks together around the edge, leaving about a half-inch open. Stuff the shamrocks with batting, and then stitch the shamrock closed. Then you can add your rhinestones.
Add green or gold flat-backed rhinestones to your shamrocks as your heart desires. Use different shapes, or use varying patterns for each heart—you’ll have 8 hearts total.
Once you’re done with the bling portion of the project, you can stitch the shamrocks to ribbon. You’ll need about 80 inches of ¼” ribbon, either white, gold, green, or orange.
Starting 5 inches from the end, stitch one shamrock edge to the ribbon. Every 8 and ¾”, stitch another shamrock to the ribbon until you have a full garland. Then hang from a window!
Pot of Gold
An easy-to-make candy dish for golden chocolates that you can bring out every year. Who knows—maybe it will even lure out a leprechaun!
For this fun project, you’ll need the following:
· Small terra cotta pot (3 inches wide at the top)
· Black acrylic paint
· Flat-backed gold rhinestones
· Gold glitter paint · Four-leaf clover template
· Adhesive
Paint the terra cotta pot black, inside and out, and let it dry completely. The upper rim of the pot is going to be completely covered in gold rhinestones. Since the pot is small, the smaller the rhinestones, the easier it will be to place them. Work your way around until the rim is covered.
The pot will have two four-leaf clovers on opposite sides of the base of the pot. Using 1-inch wide clover templates, use small gold rhinestones to make your four-leaf clovers. If you don’t want an all-gold pot, you can always make a classic green clover.
If you’re noticing gaps between your rhinestones and want to do a little bit of touching up, use your glitter paint to carefully fill in the gaps. However, you can avoid gaps by placing rhinestones in the “corners” of each other, not directly side-by-side.
Finally, get gold-wrapped chocolates and fill your leprechaun’s stash for everyone to enjoy!
Festive Headband
We’re not talking about those headbands with the wobbly antennae. Instead, this cute rainbow and shamrock headband is something that brings a little bit of charm without going over the top.
You’ll need a thin headband to start, as well as thin rainbow ribbon and glue. Glue ribbon to one end of the headband, and carefully wrap the ribbon around the headband until it is fully covered. Snip the other end, leaving about ¼” excess. Glue and tuck in the end piece.
Use green felt and a four-leaf clover template (check out the pencil topper project). Cut out a clover that’s about two inches wide, but if you want one that’s a little bit bigger, go for it!
Glue the middle of the clover off-center of the headband. The final touch will be adding a fabulous green rhinestone to the center of the clover. Use an interesting shape to add your own spin on it!
The Finest Swarovski Crystals The Rhinestone Shop has an amazing selection of authentic Swarovski crystal rhinestones, tools, and accessories for all of your projects, no matter the occasion.
DIY Rhinestone Crafts for Valentine’s Day
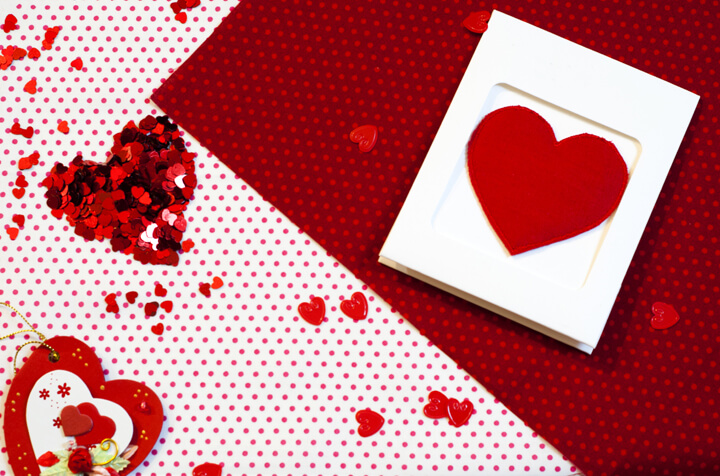
Valentine’s Day has long been associated with tokens of love, and it has also, for us at the Rhinestone Shop at least, become an opportunity to make some cheery seasonal rhinestone crafts. Check out our Valentine favorites.
Flower pins
Make these easy and cute little flower pins for your Galentine’s lunch. To make these flowers, you’ll need the following:
- Chiffon
- Round, flat-backed, sew-on rhinestones
- Felt
- Pin back
- Glue
- Needle and thread
- Scissors
Cut ten layers of chiffon in a flower pattern that is two inches wide. Lay the chiffon layers alternating the petals so there is overlap. Cut a matching piece of felt and place it as the back layer.
Use needle and thread to sew the rhinestone through the middle of the chiffon layers and felt to unite the layers and create your flower. Crinkle the chiffon to “fluff” the flower.
Finally, glue the pin back to the felt and let the pin set. Repeat until you have enough for all of your friends!
DIY Bangles
Accessorize your Valentine’s Day! Crafts stores actually sell wooden bangles that you can paint in your favorite Valentine’s colors and bling with your favorite rhinestones.
Try less traditional versions of red and pink as your paint colors, which will make them wearable beyond the Valentine’s season. Get a mix of bangle sizes and shapes. For example, mix wide, flat bangles with thin, rounded ones.
Use acrylic paint to coat the inside and outside of the bangles, and use silver, red, or pink flat-backed rhinestones to create rhinestone patterns. This can also be a good time to use fun shapes like deltas and squares. Get creative!
String Art
Make wall art that spreads the love in February.
For this charming and rustic craft, you’ll need a few atypical craft tools, along with some of the usual suspects.
- Wooden board
- 25–40 flat-head, 1.5-inch nails
- Red or pink string (embroidery floss or thin yarn works well)
- Red or pink flat-backed rhinestones
- Glue
- Hammer
- Scissors
Use a heart template, size it to approximately six inches wide and trace it on to your wooden board. Carefully nail your nails about one-half inches apart around the template. The nails should be nailed in so they are straight and secure.
Cut an approximately 3-foot piece of string and tie one end to the bottom nail of the heart. Weave the string lengthwise across the heart to another nail, then wrap and take the string in an opposite direction. Continue this until the string has wound around every nail on the heart and tie off the end. Snip the loose ends.
Glue a round, flat-backed rhinestone to the head of each nail head to finish the piece. If you wish to hang your string art, attach a frame bracket to the back.
Heart Mobile
If you’re a new parent or parent-to-be and you’re looking for a fresh project, why not make a cute heart mobile for the baby’s room? You’ll need:
- Ribbon
- 8-inch dowel
- Acrylic paint
- Felt, assorted colors
- Batting
- Heart-shaped rhinestones
- Scissors
- Needle and thread
First you’ll want to make your stuffed hearts, which will hang from the dowel. Cut hearts in matching pairs, about three inches wide. Use a printable heart template from the String Art guide.
Stitch most of the way around the outside of the heart, then stuff with batting, and then finish sewing the heart. Make five hearts total, and attach a heart-shaped rhinestone to the middle of each heart.
Cut five lengths of ribbons, varying in length from five to eight inches. These will then be sewn to the top of each heart. Paint your dowel, if desired.
Tie each heart to the dowel, making sure there is room for the hearts to hang. Cut a 24-inch piece of ribbon and attach to the dowel and use it to hang your mobile.
Cedar Votive Holders
Create something that’s a blend of rustic and bling that will help set a romantic and unique table.
To make these votive holders, you’ll need cedar discs, which you may be able to find from your yard or from a neighbor, but you can also buy them online.
Ultimately, a tea candle is going to rest partially inside it, so you’ll want a disc that is relatively thick. Use a tea candle to make an outline on a cedar disc. Using a rotary tool, carefully remove wood where the tea candle will go. Be patient—this part may take a little time, and be sure not to cut all the way through the disc.
To finish the disc, add rhinestones to either the sides of the disc or the top that will surround the candle. The rhinestones will help the candlelight sparkle!
